Tuesday, July 28, 2009

Chunky Oatmeal Almond Chocolate Chip Cookies


Chunky Oatmeal Almond Chocolate Chip Cookies

1 cup Whole Wheat Pastry Flour
1.5 cups Oat Flour*
2 oz. (1/4 cup) grated dark chocolate**
.5 tsp. baking powder
.5 tsp. baking soda
1/4 tsp. fine grain sea salt

1/2 cup (1 stick) unsalted butter at room temperature
.5 cup natural cane sugar (I like Florida Crystals brand)
.5 cup demerara (or light brown) sugar
2 large organic eggs
1/4 cup chunky almond butter (or same amount natrual chunky peanut butter)
1 tsp. vanilla extract

6 oz. (3/4 cup) dark chocolate chips, or dark chocolate chunks

Special equipment: Stand or hand mixer.

Preheat the oven to 375° and line 2 cookie sheets with parchment paper.

Whisk the dry ingredients together until thoroughly combined. Next, cream the butter and the sugars together by whisking them with your mixer for 2 minutes, or until they become fluffy. Add the eggs and whisk for another minute, then add the vanilla and almond butter and whisk for 1 more minute.

Combine the wet and dry ingredients, mixing with a large spoon or silicone spatula until the ingredients are well combined, then stir in the chocolate chips.

Use a small spoon to scoop the dough and use your hands to form balls about 2 inches in diameter. Place the dough balls on the cookie sheet and flatten a little with your fingers. Bake for 10 minutes, then remove from the oven and let them cool for 10 minutes. Serve with ice-cold milk.

*To make Oat Flour, simply place 1.5 cups of rolled oats in a food processor and blend until they form a fine powder, though I like some oat pieces in my cookies.

**Run some chocolate chips through the food processor right after you’ve ground your oats.

arm4.static.flickr.com

Beetroot Salad


Beetroot Salad

Grated organic raw beetroot, carrot, apple
Shredded red cabbage
Finely chopped red onion
Grated fresh ginger
Handful of raisins
Juice of ½ lemon
Dressing: 2tblsp Olive oil, 1 tbsp flax oil, ½ tblsp apple cider vinegar, crushed garlic, ½ tsp mustard, 1 tsp maple syrup

Mix all together and enjoy!
http://www.healingwithnutrition.co.uk/nutritionrecipes.htm

Monday, July 27, 2009

Quinoa Cocoa Cupcakes


INGREDIENTS
3/4 Cup cooked Quinoa
1/3 Cup Vegetable Oil
2/3 Cup White Sugar
1-1/2 Teaspoons Vanilla Extract
1 Teaspoon Baking Soda
3/4 Teaspoon Baking Powder
1/4 Teaspoon Salt
1/2 Cup Cocoa Powder
1/2 Cup Whole-Wheat Pastry Flour
1 Cup White Flour
2 Tablespoons Water

METHOD
First, rinse off just over 1/3 cup of dried quinoa. ( It has a bitter coating that must be rinsed off. ) Before baking, pre-cook the quinoa. Place quinoa in a covered pot with about 2 cups of water and a pinch of salt. Bring to a boil, and simmer approximately 25 minutes. Check to ensure quinoa does not boil dry. Allow to cool.
Preheat oven to 350 degrees. Line cupcake tin with paper liners.

In a large bowl, mix all ingredients well.

Bake at 350 degrees for about twenty minutes, or when a toothpick inserted in the center comes out clean.

www.vegan-food.net

Plum Sauce


Wild Plum Sauce

Sweet, sour, and surprisingly spicy, use this sauce to add zing to spring rolls, tofu, or seitan.

1 pound whole wild plums (or pitted regular plums)
3-4 cloves garlic, minced
1 tablespoon fresh ginger root, minced
1/8 tsp cayenne pepper (use less if you like)
1 tsp soy sauce (or salt to taste)
1/4 teaspoon shallot or onion salt (optional)

As needed: sugar or other sweetener and/or vinegar

Pick over the plums to remove any stems or debris and rinse them well. Place in a saucepan and add water just to barely cover them. Bring to a boil, reduce heat, and simmer until skins have burst and plums are soft, about 20-30 minutes. Remove from heat and allow to cool for a few minutes.

Place a colander over a bowl. Put the plums in the colander and press with the back of a spoon to squeeze out the juice. (You could also do this in a cheesecloth bag.) Allow the plums to drain until all juice is removed.

Heat a saucepan over medium-high heat. Saute the minced garlic and ginger in a tablespoon of water for 2 minutes, adding more water if needed to prevent sticking. Add the plum juice and the remaining ingredients. Bring to a low boil and simmer until mixture reduces and thickens by almost half. (It took mine about 15 minutes.) Taste to see if any sauce is sweet or sour enough; if not add sweetener or vinegar to taste.

Use warm or refrigerate for later use.

Servings: 4, about 1 cup total

Nutrition Facts
Serving size: 1/4 of a recipe

www.fatfreevegan.com

Blueberry Oat Bars


Blueberry-Oat Bars

If you prefer a sweeter bar, add more agave nectar, sugar, stevia, or your favorite sweetener to the blueberries as they are cooking. Or add a sugar glaze on top by mixing a little vegan powdered sugar with water until it's the right consistency for drizzling.

1 pint blueberries
1/4 cup agave nectar
1/4 cup apple juice
1/2 teaspoon vanilla
2 tablespoons cornstarch mixed with enough water or juice to form a smooth paste

3 cups oatmeal* (regular, not instant)
1/2 teaspoon cinnamon
1 1/2 teaspoons baking powder
1/4 teaspoon salt
6 ounces unsweetened applesauce
6 tablespoons (3/8 cup) agave nectar
6 tablespoons (3/8 cup) water
1 teaspoon vanilla


Preheat oven to 375F. Oil an 8x8-inch baking dish.

In a small saucepan, combine the blueberries, agave nectar, and juice. Bring to a boil over medium-high heat. When it boils, stir in the vanilla and the cornstarch mixture. Continue to stir as the mixture boils and thickens. Remove from heat and set aside.

Put 1 1/2 cups of the oatmeal into a blender and grind it to a fine powder. Pour it into a medium-sized mixing bowl and add the remaining oatmeal, cinnamon, baking powder, and salt. Mix well. Stir in the apple sauce, agave nectar, water, and vanilla, and mix well.

Spread half of the batter into the prepared pan, smoothing well to cover the bottom of the pan. Spoon the blueberry filling over the batter, and cover the blueberries with the remaining batter.

Bake for 30 minutes, or until the top is lightly browned. Allow to cool before cutting into bars.

*Use gluten-free oats to make these gluten-free.

Makes 16 bars. Each contains 117 Calories (kcal); 1g Total Fat; (7% calories from fat); 3g Protein; 26g Carbohydrate; 0mg Cholesterol; 81mg Sodium; 2g Fiber. Weight Watchers 2 Flex Points.

www.fatfreevegan.com

Friday, July 24, 2009

HOT & SOUR CABBAGE SOUP


Hot and Sour Cabbage Soup
Serves six?
1 Tbs Oil
1 Small Onion, minced
1 Small Cabbage, about the size of a grapefruit
2 Large Carrots, chopped
1 15oz Can Tomatoes, blended smooth
6 Cups Water
1 Cup Cubed Pressed, Baked Tofu (like wildwood baked)
1/4 Cup Tamari, low sodium
1/3 Cup Seasoned Rice Vinegar (see note on substituting above)
1 tsp Hot Red Chili Flakes
1/2 tsp Salt
Black Pepper, to taste (a lot!)
Heat a large 5 qt soup pot that has a heavy lid over medium heat. Add oil and onion, and saute until golden. Meanwhile, quarter your cabbage, remove the core, and shred the cabbage with a large chef’s knife. Add carrots, tomatoes, cabbage and water to the pot and stir well. Add the tofu, tamari, vinegar, chili flakes and salt. Bring to a boil, cover, then turn heat down to medium low. Simmer for 20 minutes or until cabbage and carrots are the desired tenderness.
Grind a lot of fresh black pepper over the top and serve.

www.veganyumyum.com

SPICY SWEET POTATO FRIES


Sweet Potato Fries
Plenty of fries for two
2-3 Medium Sweet Potatoes, peeled
Oil and Spice Rub
2 Tbs of Earth Balance, melted ( margarine)
1/4 tsp Paprika
1/4 tsp Chili Powder
1/4 tsp Red Pepper Flakes
1/4 tsp Salt
Black Pepper
Preheat oven to 450º F.
Slice potatoes into thin fry shapes with a large chef’s knife. Mix melted earth balance and spices together and toss the potatoes in it. Place oiled/spiced fries on a baking sheet covered in parchment paper (they might stick to foil). Do NOT crowd the pan - you want space between every fry. Bake for 20 minutes, turning every 10 minutes.
Place potatoes under the broiler, turning every minute or so and keeping a close eye on them. Broil them for as long as you can without incinerating them. Serve immediately or you’ll lose any crispiness you achieved. Goes great with ketchup or a creamy vegan mayo.

www.veganyumyum.com

sundried tomato & basil couscous with aceto balsamico


Sundried Tomato and Basil Couscous with Aceto Balsamico
Serves two
3 tsp Olive Oil
1/4 tsp Salt
1/4 Cup Chopped Fresh Basil
10-12 Oil Packed Sundried Tomatoes, chopped
1 Cup Couscous
1 Cup Boiling Water
1/4 Cup Pine Nuts, toasted
Aceto Balsamico di Modena
Place 1 1/2 cups of water on the stove or in a kettle to boil. In a bowl, mix the olive oil, salt, basil, tomatoes, and couscous until combined. This is what it will look like before you add the water:Measure out 1 cup of boiling water and pour over couscous mixture. Cover with plastic wrap and let sit for 5 minutes.
Meanwhile, heat a dry skillet over medium heat and add pine nuts. Stir occasionally until toasted, being careful not to burn. (Right before they begin to brown you’ll see that they become shiny. Don’t walk away because they go from toasted to burnt very quickly!) Set toasted pine nuts aside.
Lightly fluff the couscous with a fork, adding toasted pine nuts. Drizzle aceto balsamico over the top. This may be eaten immediately, but it also is very nice as a room temperature dish.

www.veganyumyum.com

TOMATO BASIL CREAM PASTA


Super Quick Tomato Basil Cream Pasta
Serves Two
1 Large, ripe tomato (2 cups roughly chopped, 1 1/2 cups blended)
1/2 Cup Raw Cashews
1 Tbs Tomato Paste
1/4 Cup Water
2 Tbs Olive Oil
2-4 Cloves Garlic, minced, optional
6 Ounces (ish) Whole Wheat Spaghetti
1 tsp Salt (edit: upped from 3/4!)
2-3 Tbs Wine or Water, optional
1-2 tsp Freshly Cracked, Coarse Black Pepper
1 Large Handful Fresh Basil Leaves, chopped
Put a large pot of salted water on to boil.
Core the tomato, then roughly chop it. Add it to your blender, seeds, skin and all. Add cashews, tomato paste, and water. Blend until very smooth.
Add olive oil to a large saute pan over medium-high heat. Add garlic and saute until golden, being careful not to burn. Once water is boiling, add pasta. Pour sauce from the blender into the saute pan and bring to a simmer. Add salt and let cook for 4-5 minutes, stirring occasionally.
If desired add wine/water to thin out the sauce. Taste and season more if necessary. Let simmer until pasta is finished cooking. Once pasta is cooked, drain. Add pasta to the saute pan with black pepper and freshly chopped basil leaves. Toss to coat. Serve immediately, garnishing with more pepper and basil.

www.veganyumyum.com

Vegetable Broth Recipe


Vegetable Broth
Makes about 10 Cups of Broth
Minimalist Broth
2-3 Tbs Olive Oil
1-2 Large Onions, chopped
1 lb Celery, Chopped
1 lb Carrots, washed but unpeeled, chopped
3 Whole Cloves Garlic
1 Bay Leaf
10 Whole Black Peppercorns
2 tsp Salt
1/4 Cup Low Sodium Tamari
1 Gallon Water
I also added, because I could
2 Parsnips, chopped
2-3 Tbs Tomato Paste (or one or two tomatoes)
A few Sprigs Rosemary (parsley is more traditional, use a lot!)
1 Head Broccoli (a strange but decent choice)
1 Sweet Potato (another odd choice, whatever)
You might also have or want to use
Any fresh veggie scraps from other meals
Leeks
Mushrooms
Celery Root
Potatoes
Peppers
Turnips
Any Greens
Zucchini
Fennel
You see what I mean? If it’s clean and fits in the pot, it can go in. Minimal chopping, no peeling, just in the pot it goes!
Heat a large stock pot with some olive oil in the bottom. I chop my way through the vegetable list as I’m cooking–so once the onion is chopped, add it to the pot, then do the celery, the carrots, etc, adding each thing once it’s chopped up a bit. When you’re out of stuff to add, pour in the water, turn up the heat and cover. It should only take you about 20 minutes to chop everything and get it in the pot. From then on out it’s easy street.

www.veganyumyum.com

make your own apple butter


Crock Pot Apple Butter
Makes 4 Pints
5 1/2 lbs Apples, peeled and finely chopped (as many different kinds as you can!)
4 Cups Sugar
2-3 tsp Cinnamon
1/4 tsp Ground Cloves
1/4 tsp Salt
1 Sprinkle Nutmeg
Peel and core the apples. Slice finely or puree in a food processor. Add apples and remaining ingredients to your crock pot. Cook on high for 1 hour, then on low for 8-10 hours. Remove lid (or crack it open a bit) and cook on high until a wooden spoon stands upright in it. The apple butter will have reduced by about half to get to this point. Blend if desired.
Fill sterilized jars with simmering apple butter and process for 15 minutes in a boiling-water bath. Remove jars and let sit, undisturbed, overnight. Test the seals and refrigerate any jars that have not sealed completely. Fully sealed jars will keep for 18-24 months unopened. Once opened, the apple butter will keep for 2 months in the refrigerator, or indefinitely in the freezer.
Good luck!

www.veganyumyum.com

Smore's


www.veganyumyum.com

Potato Salad with Fava Beans
Serves 2-4
1 1/2 to 2 lbs New potatoes, halved
1 1/2 Lbs Fresh Fava Beans, or 3/4 cup Edamame or Peas
Dressing:
1/2 Cup Mayonnaise
2 tsp Dijon Mustard
2 Tbs Fresh Herbs (I used parsley and marjoram)
1/4 tsp Salt
1/4 tsp Fresh Black Pepper
*This brand is highly recommended. It’s the closest to non-vegan mayo I’ve found, by far.
Whisk together the ingredients for the dressing. Refrigerate it until ready to use.
Shuck the fava beans by “unzipping” them and breaking open the pods. Blanch the whitish-green beans in boiling salted water for 2-3 minutes. Remove and rinse under cool water to stop the cooking. Use your nail to break open the seed cases and squeeze out the bright green bean. Set aside.
Boil the potatoes in well-salted water until tender but not falling apart. You can also cook them in a pressure cooker on the second ring for 4 minutes, using the natural-release method.
Let the potatoes cool, but not all the way. When the potatoes are still hot/warm, but cool enough to handle, mix them with the dressing and fava beans. Let sit for several minutes before serving to allow the flavors to blend, or refrigerate until ready to serve. I think it tastes the best at room temperature or slightly warm, so serving them shortly after preparing is best.

www.veganyumyum.com


www.veganyumyum.com

Easy Weekend Pancakes


Easy Weekend Pancakes
Makes about 25 Silver Dollar Pancakes, enough for two people

1 1/2 Cup Soymilk
1 Tbs Sugar
2 Tbs Oil
1 Cup Spelt (or all-purpose*) Flour
1/3 Cup All-Purpose Flour
1 tsp Baking Powder
1/4 tsp Salt
1 tsp Extract (any flavor, I used orange, but vanilla is a no-brainer)
1-2 Tbs water, to thin batter if needed
*If using only all-purpose flour for this recipe, you may need to add more liquid. Regular flour absorbs more moisture than spelt.
Add soymilk to your blender. Add remaining ingredients except the water and blend for a few seconds until combined. Scrape down any dry flour stuck to the side of the jar and blend again. Place the top on the blender and refrigerate overnight. You can also use the batter immediately.
In the morning, place the blender back on the base and add 1-2 Tbs of water, blend to mix. This re-thins the batter that had thickened overnight.
Preheat oven to 200º F, or the lowest setting, and put an oven-safe plate on the middle rack. Heat a non-stick skillet over medium heat for a few minutes. Pour the batter directly into the center of the UNgreased heated pan. I like silver dollar sized pancakes, 2 1/2 to 3″ in diameter, but you can make any size you want. This batter should create fairly thin pancakes.
After a few minutes of cooking, you’ll see the bubbles form and set on the uncooked side of the pancake. The batter will start to set, and it will change color from white to dull yellow. This is when you should flip. If your pancake isn’t brown by this time, turn your heat up. If it is overly brown, your heat is too high.While cooking the pancakes, place the finished ones directly into the oven on the plate. Stack the pancakes as you go. This will keep the whole stack warm while you’re cooking them.

http://veganyumyum.com/2008/02/easy-weekend-pancakes/

Thursday, July 23, 2009

Sew your own reusable produce bags


www.gogreen.com

How to open a coconut


Drain the water out by digging a knife into the softest black spot at the top of the coconut (there are 3, but one is soft). Then use a hammer to repeatedly hit the center of the coconut while turning it in your hand. It will crack down the center. Use a pear knife to cut little pieces out of the nut. You do this by pressing (like in the picture) down into the pulp of the coconut and then flicking the knife to one side which will pry the piece out. If you are doing it right it will only take you a couple of minutes to get the whole thing out!

www.beautiful-vegan.blogspot.com


www.beautiful-vegan.blogspot.com

Sweet cashew coconut balls on a fruit plate with chopped almonds and birch syrup


www.beautiful-vegan.blogspot.com

"Seeds are one of nature's most perfect foods. They contain all the nutrients necessary to sustain the growth of budding seedlings until the seedling has developed a root system large enough to sustain growth from soil sources. One of the few foods more perfect than raw seeds are sprouted seeds. The sprouting process decreases the carbohydrate and increases the vitamin and protein content in these 'live' foods."

www.barfblog.foodsafety.blogspot.com

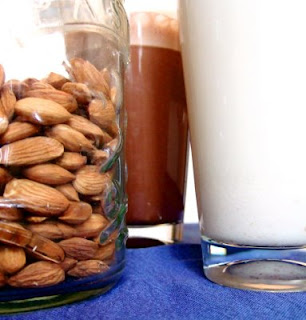
make your own almond or cashew milk! here's how..


You can use raw, unsalted cashews or almonds for this recipe.

1/2 c soaked almonds (or if you are using cashews they do not need to be soaked)
3 or 4 T raw agave nectar (or raw sugar)
4 c water
3/4 t sea salt
1 t vanilla extract (optional)

Put the ingredients in a blender for a couple of minutes and pour it through a sieve if it is made with almonds- (you don't need to filter the cashew milk because the cashew are soft and turn into cream easily). Use a sieve with larger holes at first to catch the bigger pieces of nuts and then pour it through a finer one so it will be smooth.

Use this milk to replace any recipe that calls for milk, or chill it and drink as is. I love it so much. I make milk shakes by adding bananas, ice, cinnamon and clove powder to the blender.

raw mushroom soup


In a blender:
1/2 c dried or fresh Velvet Shank Mushrooms* (or your favorite mushrooms)
4 c hot water (but not too hot)
2 Tablespoon raw almond butter or 1 T natural peanut butter
1/2 of a small garlic piece
1 teaspoon sea salt
1 Tablespoon olive oil
1 Tablespoon raw tahini
garnish with paprika and little velvet shank mushrooms (because they're so pretty- they float like tiny umbrellas!) To make it more creamy you can add half an avocado or 1/2 cup of raw cashews to the blender, but it's optional.

*Dried mushrooms should be soaked in cold or room-temperature water for a few minutes before you make the soup, and you can strain and use the mushroom water in your soup too. Dried mushrooms have a more condensed, strong flavour than fresh mushrooms, so you can add more of the fresh if you like. Blend for a couple of minutes. And that's it! Makes 2 large bowls.

www.beautiful-vegan.blogspot.com

raw vegetable soup with almonds & sun-dried tomatoes


This soup is so simple and absolutely delicious! Here's the recipe:

In a blender:
1 c carrots
1 c tomatoes
7 pieces of sun-dried tomatoes
2 T olive oil
1/2 a small piece of garlic
1 T thyme
1 T lime juice
1/2 t oregano
1 t agave nectar (optional)
4 c hot water
1 1/2 t sea salt

1. Blend until smooth 2. Chop up some vegetables like celery, red onion, red cabbage, tomatoes (whatever is in your fridge), and add it to the soup. 3. Chop up some raw almonds and more sun-dried tomatoes and sprinkle them on top with a bit of black pepper and olive oil (to make it pretty). Now eat it! Makes 2 large bowls.

www.beautiful-vegan.blogspot.com

BASIL AVOCAD DIP


I love this one! It's great in so many ways. Use it as a vegetable or pita bread dip, as a raw sauce to go over pasta or rice, or... as a wicked salad dressing. Here's how to make it:

in a food processor:
1 avocado (peeled and pitted)
1/4 c sunflower seeds (raw, unsalted and shelled)
2 cloves of garlic (or 1 if you don't like it too garlicky- is that a word?)
1 T apple cider vinegar
1 t sea salt
1 T tahini (raw)
1/4 t freshly ground black pepper
2 c fresh basil (well washed)
1 1/2 T fresh lemon juice (not from a bottle!)

Let it process for a few minutes until it's really creamy and then do what you like with it! If you'd like to introduce more raw food into your diet this is a good way. You don't have to cook sauces to go over your pasta or rice (let whatever you put it on cool a bit before adding the sauce or it will cook it and lose all those amazing enzymes you were trying to get). It tastes the same as cooked, actually it's better, because you are using the real, fresh flavour of the vegetables instead of cooking it out of them, along with the fresh herbs and spices. And it takes a fraction of the preparation and clean up.

www.beautiful-vegan.blogspot.com

Wednesday, July 22, 2009

Coconut OIl


The healing properties of coconut oil:

* Coconut oil is antiviral, antifungal (kills yeast too) and antibacterial. It attacks and kills viruses that have a lipid (fatty) coating, such as herpes, HIV, hepatitis C, the flu, and mononucleosis. It kills the bacteria that cause pneumonia, sore throats, dental cavities, urinary tract infections, meningitis, gonorrhea, food poisoning, pneumonia, and many, many more bacterial infections. It kills the fungus/yeast infections that cause candida, ringworm, athletes foot, thrush, jock itch, diaper rash and more.

* Coconut oil is called the "low fat" fat. It actually acts like a carbohydrate in that it is quickly broken down in the liver and used as quick energy. It is NOT stored like other fats. It boosts one’s energy and endurance. Many athletes use it blended into their drinks. It also supports thyroid function and increases your metabolism (great if you want to lose weight).

* Coconut oil improves digestion and absorption of fat soluble vitamins, minerals (especially calcium and magnesium), and amino acids. It improves the body’s use of blood glucose and improves insulin secretion and absorption (great for type II diabetes). In fact, many diabetics (type I and type II) use it to reduce their symptoms. One’s risk of diabetes decreases with regular use of coconuts and coconut oil. And as we already mentioned, cooking with coconut oil does not create any harmful byproducts.

* Coconut oil helps the body heal and repair faster. It aids and supports immune function, protecting us from a variety of cancers.

* Coconut oil, contrary to much hubbub, is good for your heart. It keeps our blood platelets from sticking together (and causing dangerous clots). Regular users of coconut oils have a much lower chance of atherosclerosis (clogging of the arteries), arteriosclerosis (hardening of the arteries), and strokes. Coconut oil can lower your blood pressure.

* Coconut oil is a natural antioxidant. It protects the body from free radical damage and prevents premature aging and degenerative diseases.

* Finally, coconut oil is the best massage oil on the planet. What it does to your skin, you simply have to witness. It forms a barrier against infections, softens and moisturizes your skin, and prevents wrinkling, sagging, and age spots. It promotes healthy hair and complexion, protects from any damaging UV rays.

source = http://www.mnwelldir.org/docs/nutrition/coconut.htm

Tuesday, July 21, 2009

things to do with tin cans...


www.meredith.com

Photo Cans


The DIY CanFrame: Transform a Tin Can into a Simple Photo Frame in 15 Minutes
Beautiful! Simple! Cylindrical! All the qualities you look for in the finest photo frames, now available in the CanFrame — a simple DIY photo frame project from Photojojo.

Our tutorial will step you through an insanely simple way to show off your photos for the price of a 79 cent can of beans. All you need is the aforementioned can, some glue, a photo, and 15 minutes!


THE INGREDIENT LIST

A great photo — Panoramas work best, but regular photos that can be cropped wider than they are tall also work well.
Metal can — Soup, beans, oatmeal, anything with a label should work. We’ve used tin cans and plastic/glass jars.
Acid-free rubber cement — We used rubber cement, but stronger stuff will give better results with heavy photo paper.
Scissors or cutting blade
Tape measure (or a ruler and a calculator)
Rubber bands
STEP 1: MEASURE YOUR CAN

Use a tape measure to measure the height and circumference of your can. These will be the approximate dimensions of the image you need to print.

(Of course, you’re a smarty and you’ve already figured out that a ruler and a calculator can take the place of a tape measure–just measure the height, then measure the diameter of the top of your can. The can’s circumference is Pi x Diameter of the top.)

STEP 2: PRINT YOUR PHOTO

Use your favorite image editing program to resize your photo to the dimensions you measured earlier. Your image height should match the height of your can, and the length should match the can’s circumference.

To give yourself some wiggle room later, make your image a smidge taller and about a half inch to an inch wider than you measured. Giving yourself extra width is particularly important, as you’ll want some overlap to help the glue set properly.

Finally, the thinner the paper your photo is printed on, the more willing it’ll be to conform to the curvature of your can. We used plain paper with great results, though glossy photo paper worked, too.

STEP 3: CUT YOUR PHOTO TO SIZE

Once printed, use scissors or a cutting blade and ruler to trim your photo to match the height and circumference of your can.

Remember to leave yourself at least a half inch of extra width for overlap and a little extra height. (You can always trim away the excess later if you need to.)

STEP 4: GLUE YOUR PHOTO TO YOUR CAN

To affix your photo to your can, you can use any kind of strong glue that will bond paper.

Here’s how to form a strong bond if you’re using rubber-cement: Apply your cement to your can and let it dry. As it dries, apply a good coat to the back of your photo. Make sure to glue the overlapping part of the photo so it’ll stick to itself, and press the wet photo to the dry can.

STEP 5: TIE IT TIGHTLY AND WAIT

To help the photo bond to the can label, wrap the can tightly with several rubber bands. Make sure you’ve worked out all the air bubbles, and leave the rubber bands and can overnight to ensure a good, solid seal.

Ta da! You’re done!

for directions with photos go to:
www.kottke.org/plus/ misc/images/photo-cans.jpg

Make your own Paper dolls!


here is the link for the doll and some clothes to print off as well:
http://jas.familyfun.go.com/arts-and-crafts?page=CraftDisplay&craftid=10559

www.familyfun.go.com

paper birds


CRAFT MATERIALS:
Scrapbook paper
Scissors
Pencil
Colored paper clips
Tape
Glue stick
Hole punch or pushpins

Time needed: Under 1 Hour
1. For each, draw a bird figure on a piece of scrapbook paper (or download our template). Cut out this figure, trace it, and cut out the matching shape.

2. Bend a colored paper clip or two into feet and tape them to the back side of one figure. Use a glue stick to join the two matching figures, sandwiching the paper clip legs between them.

3. Make an eye with a hole punch or pushpin and adjust the legs so that the bird can stand on its own.

www.familyfun.go.com

Monday, July 20, 2009

cupcakes


photos by www.allthingsnice.typepad.com

PAVLOVA


Pavlova Recipe*

Meringue:
4 large room temperature Egg Whites
1 cup of Castor Sugar, also known as 'Berry Sugar'
1 tsp of White Vinegar
1/2 tbs of Cornstarch

Topping:
1 cup of Whipping Cream
1/2 tsp of Pure Vanilla Extract
Fresh Fruit such as strawberries, raspberries, kiwi fruit, passionfruit, bananas, blueberries

Method:

Preheat the oven to 140 degrees and place the rack in middle of the oven. Line a baking tray with foil and draw a 7 inch circle on the foil with a blunt knife. Set aside.
In a clean medium-sized bowl, mix the egg whites with a clean electric mixer on medium speed. Whip until the whites form soft peaks.
Add the sugar to the egg whites, one gentle teaspoon at a time. Don't just lump the sugar in the bowl, try sprinkling it instead and never stop whipping until you finish the sugar. Your egg whites should now be glossy stiff peaks. Taste the mixture and if the sugar is still gritty then keep whipping for a few more minutes until the sugar is dissolved.
Sprinkle the cornstarch and vinegar on the meringue and fold gently with a plastic spatula.
Now gently spread the meringue in the circle on the foil and make sure the edges of the meringue are slightly higher then the centre so you have a slight well in the middle.
Bake the meringue for about 1 hour and 15 minutes or until it goes a very pale egg shell colour and is hard to touch on the outside.
Turn the oven off and leave the door slightly ajar to let the meringue cool completely. As the meringue cools, it will crack slightly.
Just before serving, take the meringue out of the oven and remove it gently from the foil and place on a plate.
Whip up the cream with the vanilla extract until it forms slight peaks. Prepare the fruit.
Gently spread the cream to the top of the meringue and arrange the fruit on top.

recipe & photos taken from: http://allthingsnice.typepad.com/tastebuddies/2007/07/the-pavlova-is-.html

Blueberry & Peach Tart


photo & recipe taken from www.allthingsnice.typepad.com
Peach Crème Fraîche Tart with Wild Blossom Honey
(makes 2 small tarts)

Tart Crust

1 1/4 cups of unbleached flour
1/4 cup of brown sugar
1/2 tsp of sea salt
7 tbs of cold butter, chopped into 1/2 inch cubes
1 large egg

Tart Filling

1 cup of cream cheese
1/2 cup of crème fraîche
1 1/2 tbs of wild blosson honey
1 1/2 cups of blueberries
1 tbs of cornstarch

Special Equipment

Fluted tart pan with a removable bottom (3"X 3/4")
Pie weights

Method:

Heat the oven to 350 degrees Celsius.
Mix the flour, sugar and sea salt in a large bowl. Add the pieces of butter and mix well until the mixture resembles coarse bread crumbs with small lumps of butter. Add the egg and knead for about 2-3 minutes.
Set the tart tins on a baking sheet and fill them with dough. Press the dough along the bottom and up the sides of the tin. Once this step is completed, cover the tins and refrigerate for about 1/2 an hour.
To bake the tart shells, set the tins on a baking sheet, butter one side of some foil and then press the buttered side down on to the base of the tart. Add the pie weights on top of the foil to cover the base. Bake for 20 minutes or until the crust is golden. Once ready, remove from the oven and set aside to cool.
Next, mix together the crème fraîche, cream cheese and honey until a smooth cream is formed. Set aside.
Add the blueberries to a small pot on the stove over a medium heat. Add the sugar and about 1/2 a cup of water. Stir and bring to the boil.
In a small cup, mix the cornstarch with about 1/3 cup of hot water to dissolve.
Once the blueberries are boiling, add the cornstarch mixture slowly and stir until the blueberry mixture thickens. Remove the blueberries from the stove and set aside to cool.
When you are ready to assemble the tarts, spoon the crème fraîche mixture into the tart shell, spread on the blueberry mixture evenly and then arrange the peach slices on top.

BEETS!


BEETS

photos taken from www.foodbuzz.com

Sunday, July 19, 2009

Kale & Carrot Soup


Carrot & Kale Soup Recipe

2 medium carrots, diced
1 medium zucchini, diced
1 medium brown onion, roughly chopped
2 garlic cloves, crushed
2 sticks of celery, roughly chopped
1 1/2 cups of roughly chopped kale
3 cups of organic chicken or vegetable stock
1 cup of water
1 1/2 tsp of sea salt
2 tbs of chopped coriander (cilantro)
5 cm piece of ginger, grated
1 1/2 tbs of olive oil
1 cup of rice
Lemon wedges for serving

Method:

Heat the oil in a soup pot over a medium-high heat. Sauté the onion until translucent for about 4 minutes, stirring occasionally. Add the garlic and fry for 30 seconds.
Add the carrot and celery and sauté for 5 minutes. Add the zucchini and ginger and sauté for about 3 minutes. Add the salt and stir.
Add the stock and water to the pot and stir well. Reduce heat, cover and simmer for 10 minutes.
Next, add the rice to the pot and stir. Cover again and cook for another 10 minutes.
Add the chopped coriander and stir well. Add the kale, stir and then simmer for 2 minutes.
Serve in soup bowls with lemon wedges for squeezing.

http://allthingsnice.typepad.com

RAW BROCCOLI SALAD


Raw Broccoli Salad Recipe
(Serves 2)

3 cups of chopped broccoli
2 cloves of garlic, finely minced
2 tbs of finely minced coriander
1 tsp of cumin seeds
1/4 cup good quality extra virgin olive oil
Juice from 1 lemon
1/2 tsp of sea salt, or if you have it, flor de sal

Method:

Wash and finely chop the broccoli, several florets at a time. Include 1 garlic clove in the chopping. Chop for another minute and then add the second clove. Keep chopping until the broccoli is a similar size to that in the picture -- 1/2cm to 1cm pieces.
Place the broccoli into a large, non-reactive bowl. Add the rest of the ingredients and then mix well with a metal spoon. Cover and let the broccoli sit in the fridge for one hour.
Serve with accompanying meal of chicken, seafood or on its own.

www.tasteofhome.com

ZUCCHINI FLOWERS


Ricotta & Garlic-stuffed Zucchini Blossom Recipe

12 zucchini blossoms
1 cup of ricotta cheese
1 large free-range egg
1/3 cup of freshly grated Parmigiano-Reggiano
1 clove of garlic, minced
4 fresh sweet basil leaves, finely chopped
3/4 tsp of sea salt
2/3 cup & 1/8 cup of all-purposed flour
1 cup of soda water
1 1/2 cups of vegetable or canola oil

see tutorial for method:http://allthingsnice.typepad.com/tastebuddies/2008/08/test-test.html